Horno freidora de aire
Newlux Air Power V120
←
→
Transcripción del contenido de la página
Si su navegador no muestra la página correctamente, lea el contenido de la página a continuación
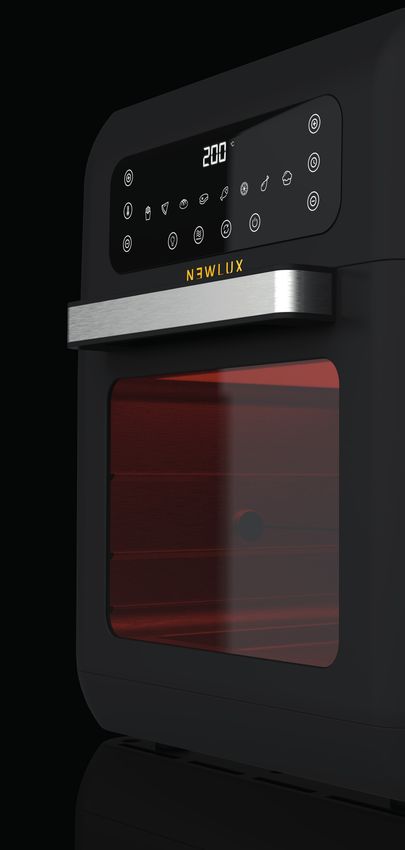
Horno freidora de aire Newlux Air Power V120
En Newlux® siempre velamos por la máxima calidad, las imágenes
  mostradas del producto son aproximadas y éste puede variar
     ligeramente con respecto a las imágenes mostradas.

  At Newlux® we always ensure the highest quality, the images
shown of the product are approximate and this may vary slightly
               with respect to the images shown.
ÍNDICE | INDEX | ÍNDICE | INDEX | INDICE | INHALT
ES | HORNO FREIDORA DE AIRE EN | AIR FRYER OVEN
Instrucciones de seguridad 5 Safety instructions 22
Características 7 Characteristics 24
Partes y accesorios 9 Parts and accessories 26
Menús y panel de control 10 Menus and control panel 27
Uso y funcionamiento 12 Use and operation 29
Cómo cocinar 13 How to cook 30
Cesta rotativa 14 rotating basket 31
Trinchador y fijadores 14 Carving and fasteners 31
Bandejas y rejillas 14 Trays and racks 31
Limpieza y mantenimiento 15 Cleaning and maintenance 32
Sistema de seguridad 16 Security system 33
Solución de problemas 17 Troubleshooting 34
Servicio de asisténcia técnica 18
Activa garantía 19
FR | FOUR FRITEUSE À AIR CHAUD IT | FORNO FRIGGITRICE AD ARIA
Consignes de sécurité 36 Istruzioni di sicurezza 50
Caractéristiques 38 Caratteristiche 52
Pièces et accessoires 40 Parti e accessori 54
Menus et panneau commande 41 Menu e pannello di controllo 55
Utilisation et fonctionnement 43 Uso e funzionamento 57
Comment cuisiner 44 Come cucinare 58
Panier rotatif 45 Cesto rotante 59
Broche et fixations 45 Forchettone e fissatore 59
Plateaux et grilles 45 Vassoi e griglie 59
Nettoyage et entretien 46 Pulizia e manutenzione 60
Système de sécurité 47 Sistema di sicurezza 61
Résolution des problèmes 48 Risoluzione dei problemi 62
DE | HEISSLUFTFRITTEUSE OFEN PT | FORNO AIR FRYER
Sicherheitshinweise 64 Instruções de segurança 78
Merkmale 66 Características 80
Teile und Zubehör 68 Peças e acessórios 82
Menüs und Bedienfeld 69 Menus e painel de controle 83
Nutzung und Betrieb 71 Uso e funcionamento 85
Kochen 72 Como cozinhar 86
Drehbarer Korb 73 Cesto rotativo 87
Drehspieß/ Befestigung 73 Trinchador e fixadores 87
Tabletts und Gitter 73 Bandejas e grelhas 87
Reinigung und Wartung 74 Limpeza e manutenção 88
Sicherheitssystem 75 Sistema de segurança 89
Fehlersuche 76 Solução de problemas 90ESPAÑOL Horno freidora de Aire Newlux Air Power V120
ES
INSTRUCCIONES DE SEGURIDAD

       ADVERTENCIA: Superficie calente, riesgo de quemaduras
    La superficies accesibles alcanzarán temperaturas muy elevadas
    durante y después del uso del dispositivo. Por ello, tócalo únicamente
    por el asa de la puerta y el panel de control. Si es necesario usa
    guantes de cocina. Además puede salir vapor caliente de la salida
    de aire, por lo tanto mantén cierta distancia.

Antes de empezar
•     No sumergir en líquidos ninguna parte eléctrica del dispositivo.
•     No debe ser utilizado por niños. No permitir que los niños manipulen
      el dispositivo, ya que produce altas temperaturas y expulsa vapor,
      podría ser peligroso.
•     Si el dispositivo tiene alguna parte dañada, no lo enciendas.
      Contacta con el vendedor o el Servicio de Asistencia Técnica (SAT).
•     Los accesorios incluidos únicamente se pueden utilizar con
      la Freidora de aire Newlux, de otro modo pueden sufrir daños
      irreparables.
•     No exponer el dispositivo al sol, ni a elementos climáticos.
•     No utilizar el dispositivo ni sobre, ni cerca de focos de calor como
      hornos o placas vitrocerámicas, podría resultar dañado.
•     No utilizar el dispositivo para funciones no indicadas en este
      manual.
•     Con el dispositivo en funcionamiento, no te acerques a las rejillas
      de ventilación, expulsa vapor caliente y podría ser peligroso.
•     Asegurarse de que el voltaje del dispositivo es el adecuado antes
      de conectarla.
•     No manipular el interruptor de seguridad.
•     No utilizar el dispositivo con un temporizador externo.
•     No utilizar enchufes múltiples ya que el dispositivo tiene una gran
      potencia.
•     Desenchufar el dispositivo de la toma de corriente cuando no esté
      en funcionamiento, durante el montaje o desmontaje y antes de
      la limpieza. Deja que se enfríe antes de montar o desmontar las
      piezas y antes de la limpieza.

                                                                         5|
¡IMPORTANTE! Con el fin de desinfectar todo tipo de sustancias nocivas es aconsejable, antes de todo, hacer una limpieza inicial al dispositivo y a sus acccesorios. Para ello, hay que lavar con precisión y a mano con una gamuza ligeramente humedecida la carcasa y con agua caliente los accesorios (aptos para lavavajillas). No usar detergentes ni objetos que rayen el dispositivo. Seguridad en el uso • Colocar el Horno freidora de aire Newlux en una superficie plana, estable y resistente al calor. Mantenla alejada de zonas que puedan verse afectada por el vapor (como paredes y armarios). • Deja un espacio de al menos 20 cm. detrás y por encima del horno. • No cocinar con el Horno freidora de aire Newlux si la puerta no está cerrada correctamente. El dispositivo no funcionará. • No desenchufar de la corriente eléctrica mientras el horno está cocinando. • No tocar las superficies que están calientes, utiliza el asa de la puerta para abrir el horno. • No utilizar el horno para otros propósitos diferentes de cocinar. • No obstruir la rejilla de ventilación con trapos u otros objetos, podría dañar el motor. • Ten cuidado al abrir la puerta del horno ya que puede tener vapor o aire caliente. • El panel del horno freidora de aire Newlux es táctil, NO TOCAR con las manos mojadas. • No mover el horno caliente o cuando contenga alimentos calientes. Deja que se enfríe antes de moverlo. Advertencias y consejos • Mantener el interior del horno y los accesorios siempre limpios, así se evitarán malos olores y sabores. • Esto es un horno freidora de aire, no llenar la cesta rotativa de manera excesiva. Ásegurate de que los alimentos tengan suficiente espacio. • Para que los alimentos estén más crujientes impregnálos con un poco de aceite. • No colocar nada encima del dispositivo mientras está funcionando o está caliente. • No desmontar la freidora de aire Newlux. En caso de manipular la freidora, ésta será excluido de la garantía. |6
ES
CARACTERÍSTICAS DEL HORNO FREIDORA DE AIRE
•   Tecnología Air Power 360º: Cocina tu comida favorita crujiente,
    sabrosa y sana sin aceite gracias a su tecnología de aire caliente
    360º. Su innovador sistema distribuye el calor de forma homogénea
    envolviendo la comida en todos sus ángulos, distribuyendo la
    temperatura de forma uniforme.

•   Capacidad extragrande 12L: Cocina para toda la familia, consigue
    cocinar hasta 10 raciones al mismo tiempo gracias a sus 12 litros de
    capacidad.

•   Mucho más que un horno, 12 accesorios incluidos: Gracias a
    sus exclusivos accesorios podrás cocinar varios alimentos a la
    vez, asar pinchos, cocinar varias pizzas, deshidratar frutas, hacer
    pollo asado y cocinar sin límites. Incluye 2 bandejas perforadas
    para deshidratar y cocinar en varias alturas, 1 bandeja de asar o
    antigoteo, 6 brochetas, 1 cesta rotativa, 1 trinchador, 2 fijadores y
    1 asa recoge grill para extraer los accesorios de forma segura sin
    quemarte. Libres BPA, PTFE y PFOA. Aptos para lavavajillas.

•   Rotative Grill: Incluye un sistema innovador para rotar los
    alimentos 360º y que se cocinen uniformemente, consigue tu pollo
    asado perfecto y tus patatas fritas crujientes por cada uno de sus
    rincones, mejorando el resultado de las freidoras de aire estáticas.

•   Multifunción Infinity 9+1: Disfruta cocinando infinitas recetas
    hasta dónde llegue tu imaginación gracias a sus 9+1 funciones
    automáticas: Freír, Pan, Pizza, Bistec, Pescado, Deshidratar, Pollo,
    Postre y Rotar. Además, incluye las nuevas funciones de calentar
    y recalentar tus platos, para evitar la pérdida de agua y conservar
    su sabor original en cualquier momento. También incluye la nueva
    función rotativa.

•   Healthy food
• Control de temperatura y tiempo: Ajusta la temperatura de
cocción de forma precisa, desde los 40 a los 210ºC. Selecciona el
tiempo de cocción hasta 90 minutos o 24h de deshidratación.
• Pantalla LED Táctil y luz interior, control total: Innovador sistema
de control digital táctil para un manejo simple, rápido e intuitivo.
Incluye una luz interna para controlar en todo momento el estado
de la comida.
• Extremadamente fácil de usar: Pon los ingredientes dentro del
horno, selecciona el programa deseado y disfruta de tu tiempo, el
producto no necesita supervisión.
• Calidad y seguridad: El horno freidora está diseñada con
materiales de alta calidad y cuenta con sistemas de seguridad
contra el exceso de calor. Cuenta con una base antideslizante
para favorecer su apoyo en el funcionamiento.
• Diseño elegante, exclusivo y compacto: Producto diseñado para
ser un elemento más de la decoración en tu cocina, compacto y
elegante con materiales exclusivos.
• Datos técnicos: Material: Plástico sin BPA + inoxidable
Medidas: 355*330*300 mm.
Peso: 6.5 Kg. (sin accesorios)
Raciones: 10
Alimentación: 220-240V, 50/60Hz
Potencia: 1500 W
Capacidad: 12L
Longitud del cable: 1 m.
Temperatura: 40-210ºC
Temporizador: 1-90 min.
Menú deshidratar 1-24h.
|8ES
PARTES Y ACCESORIOS
Apertura entrada de aire Rejilla de
ventilación
Panel de control (detrás)
Carcasa
Botón para soltar
Mango de la puerta
Puerta
Soporte para trinchar/
cesta rotativa
Rail
3 x Bandeja 1 x Cesta rotativa 1 x Asa recoge grill
6 x Brocheta Trinchador + 2 x Fijador
9|MENÚS Y PANEL DE CONTROL
Es necesario cerrar la puerta del dispositivo para que éste pueda
encenderse.
Al enchufarlo la pantalla se muestra durante 1 segundo, después el
panel desaparece dejando a la vista sólo el botón On/off, activando
así el modo Stand by.
o
C
MIN
Funciones
ON/OFF: Pulsa este botón para encender el producto. El horno
emitirá un pitido. El menú Freír y el botón On/off parpadearán durante
1 minuto.
Después de 1 minuto (aproximadamente) sin uso, el horno entrará en
modo Stand by.
Pulsa este botón para empezar el proceso de cocción, desaparecerán
todos los menús (menos el elegido) y el botón de Reheat.
Si durante la cocción necesitas cambiar la temperatura o el tiempo,
pulsa el botón de [+] o [-] , modificando así los ajustes que necesitas.
TEMPORIZADOR: El temporizador sirve para ajustar el tiempo de
cocción, se puede establecer entre 1 y 90 minutos, excepto en el menú
Deshidratar que comprende de 1 a 24 horas. Utiliza los botones [+] para
incrementar la temperaturar y [-] para disminuirla.
En cada menú puedes ajustar el tiempo. Al presionar los botones [+] y
[-] el tiempo variará 1 minuto arriba o abajo.
TEMPERATURA: Presiona este botón para ajustar la temperatura de
80ºC a 210ºC. Usa los botones [+] para incrementar la temperatura y [-]
para disminuirla.
Cada menú tiene por defecto una temperatura establecida. La
temperatura aumenta en intervalos de 5ºC cuando se pulsa
brevemente.
| 10ES
ILUMINACIÓN: Usa este botón para encender y apagar la luz del
interior del dispositivo. La iluminación cesará automáticamente
después de 2 minutos. Por otra parte, dispondrás de esta al abrir la
puerta del horno.
Al estar la luz encendida el botón parapadeará, mientras que al estar
apagada permanecerá fijo.
ROTAR: Usa este botón para rotar en función asado y para la cesta
rotativa.
Al estar la luz encendida el botón parapadeará, mientras que al estar
apagada permanecerá fijo
MENÚS: El menú elegido parpadeará simultáneamente con el botón
de On/off hasta que éste último se haya pulsado para poder iniciar la
preparación.
La hora y la temperatura correspondientes a los 10 menús por defecto
son las siguientes:
Menú Temperatura (ºC) Tiempo (min)
Precalentar 140 6
Freír 200 20
Pizza 150 12
Pan 165 15
Bistec 180 15
Pescado 160 12
Deshidratar 40 120
Pollo 180 30
Postres 160 35
11 |USO Y FUNCIONAMIENTO Cocinar con Newlux Air Power es muy sencillo, tan sólo tienes que introducir los ingredientes, programar el menú (tiempo y temperatura predeterminada) y esperar a que el horno cocine por ti. Es recomendable precalentar el horno antes de colocar los alimentos, a menos que ya esté caliente por un ciclo de cocción anterior. El precalentamiento ahorra tiempo de cocción y mejora la textura de los alimentos cocinados. Para cocinar con tu horno freidora de aire ten en cuenta: • Si la puerta no está cerrada el horno no funcionará. • No llenar la cesta de manera excesiva. • Para un mejor resultado y que los alimentos queden crujientes puedes barnizarlos con un poco de aceite. • No cocines aliemntos que contengan mucha grasa en el dispositivo. • Los alimentos congelados o las sopas deben prepararse en recipientes adecuados. • Al cocinar alimentos como pan o pasteles hay que tener en cuenta la expansión de la masa. • Es aconsejable dejar en remojo con agua las patatas al menos durante 30 minutos para reducir el almidón y después secarlas bien con papel. • El tiempo de coción depende de factores como el tamño, la temperatura, la calidad de los alimentos, etc. • Añade 3 minutos más al tiempo de coción si no precalientas el horno antes de usarlo. • Antes de cocinar bistec o altas cantidades de carne en el horno, es recomendable hacerlos antes en una sartén. ¡OJO! Si llenas demasiado la cesta los alimentos no se cocinarán de forma adecuada. | 12
ES
Cómo cocinar

1.   Selecciona el menú Preheat para precalentar el horno (sin
     alimentos).
2.   Una vez el horno está caliente introduce los alimentos.
3.   Selecciona el menú deseado presionando el botón del menú
     elegido. El menú parpadeará simultáneamente con el botón de
     On/off hasta que éste último se haya pulsado para poder iniciar la
     preparación. En el panel de control se mostrará la temperatura y
     el tiempo marcado por defecto.
4. Selecciona la temperatura presionando los botones [+] o [-]. Es
   recomendable seguir los parámetros de temperatura mostrados
   de la sección de menús y panel de control.
5. Selecciona el tiempo de cocción presionando los botones [+] y [-]
   que incrementan o disminuyen 1 minuto cada vez que presiona
   cada botón. Es recomendable seguir los tiempos marcados en la
   sección de menús y panel de control.
6.   Cuando ya está seleccionado el menú, el tiempo y la temperatura,
     pulsa el botón On/off para comenzar la cocción.
7.   Una vez que el proceso de cocción haya empezado, puedes
     modificar los parámetros de temperatura y tiempo pulsando
     en los botones [+] y [-] de temperatura o tiempo para hacer los
     ajustes que necesitas.
8.   Al acabar el tiempo de coción, el ventilador continuará en
     funcionamiento hasta que el dispositivo se enfríe. Después
     aparecerá parapadeando un OFF en la pantalla. Al transcurrir 20
     segundos aproximadamente, el dispositivo emitirá 3 pitidos y el
     OFF desaparecerá volviendo así el horno en modo Stand by.
9.   Si en la coción has usado la cesta rotativa o el trinchador extráelo
     con el asa recoge grill. Desbloquea la cesta o el trinchador usando
     el botón para soltar. Si por el contrario has usado las bandejas
     sácalas y colócalas sobre una superficie resistente al calor.

   IMPORTANTE: Cuando saques los alimentos ten cuidado con el vapor
caliente y NUNCA toques el dispositivo durante su funcionamiento
y después del mismo ya que la temperatura será muy elevada. Usa
guantes de cocina si es necesario.

                                                                      13 |
Cocinar con la cesta rotativa
1. Abre la puerta.
2. Pon la bandeja para la grasa en la parte inferior del horno.
3. Sujeta la cesta con el soporte para trinchar/cesta rotativa. Abre
la tapa de la cesta rotativa girándola en dirección al icono
que puede ver en la misma tapa. Retira la tapa e incorpora los
alimentos que elijas.
4. Cierra la tapa de la cesta girándola en dirección al icono que
puedes ver en la misma tapa .
5. Levanta la cesta rotativa con ayuda del asa recoge grill y deslízala
sobre los raíles. Pulsa el botón para soltar y mueve la cesta hasta el
final del raíl. Después libera el botón para soltar, la cesta quedará
encajada.
Cocinar con trinchador y fijadores
1. Abre la puerta.
2. Pon la bandeja para la grasa en la parte inferior del horno.
3. Unta con aceite el trinchador y los fijadores.
4. Prepara el ave antes de asarla atando bien las alas y los muslos
cerca del cuerpo.
5. Introduce la carne previamente preparada y con cuidado en el
trinchador. Empuja los fijadores sobre el trinchador y fíjalos en la
carne. Atornilla los fijadores con los tornillos.
6. Con ayuda del asa recoge grill levanta la carne preparada sobre
los raíles. Pulsa el botón para soltar en la dirección que indica la
flecha y deslízalo hasta el final del raíl. Después libera el botón
para soltar, el trinchador quedará encajado.
IMPORTANTE: No ases un trozo grande de carne ya que tiene que
guardar una distancia considerable de la pared superior del horno.
Cocinar con bandejas
1. Abre la puerta y desliza la bandeja en los raíles.
IMPORTANTE: Si pones dos bandejas en el horno intercambia sus
posiciones ya que los alimentos de la bandeja superior se cocinarán
antes que los de la inferior.
| 14ES
LIMPIEZA Y MANTENIMIENTO
Para evitar una descarga eléctrica o daños en tu horno freidora
de aire, desenchufa siempre el cable de alimentación de la toma
de corriente antes de limpiarla. Asegúrate de que el horno se haya
enfriado completamente.
No sumerja el cable de alimentación ni su horno en agua ni en ningún
otros líquidos ni utilice limpiadores abrasivos o estropajos.
Limpia la parte exterior e interior del horno con un paño suave y apenas
húmedo.
Seca bien todas las piezas después de limpiarlas, antes de usarlas o
antes de guardar el horno.
Asegúrate de que todas las piezas y superficies estén completamente
secas antes de conectar el horno a una toma de corriente. Las piezas
mojadas pueden provocar una descarga eléctrica.
Accesorios
Lavalos con agua caliente y una esponja no abrasiva.
Son aptos para el lavavajillas. Recomendamos enjuagarlas y eliminar
cualquier resto de comida seca antes de lavarlos en el lavavajillas.
Estas cestas tienen un revestimiento antiadherente. No utilice utensilios
de metal y materiales de limpieza abrasivos para evitar daños.
Para la grasa persistente mezcla 118 ml de bicarbonato de sodio y
unas cucharadas de agua en un bol pequeño hasta formar una pasta
untable. Con una esponja suave, extienda la pasta sobre las cestas
de la freidora frote suavemente. Deja actuar durante unos 15 minutos
antes de enjuagar. Después lávalo con agua y jabón antes de volver a
utilizar. Asegúrate siempre de que estén secos antes usarlos.
15 |SISTEMA DE SEGURIDAD El horno de aire Newlux es un producto revolucionario en cuanto a sistemas de seguridad. Dispone de diferentes sistemas entrelazados que actúan simultáneamente y que impiden que suceda algún fallo. El horno se detiene automáticamente cuando la puerta se abra. Éste no funcionará si la puerta no está bien cerrada. Una vez que ésta ha sido cerrada de nuevo, se reanuda automáticamente con el tiempo restante y los ajustes actuales. | 16
ES
SOLUCIÓN DE PROBLEMAS

       Problema                Posible causa                     Solución

                                                      El horno no está enchufado.
                                                      Para empezar, pulse el botón
                        El horno no está enchufado,
                                                      de on/off.
                        la puerta no está cerrada
El horno no funciona.
                        o el dispositivo está         Asegúrate de que la puerta
                        defectuoso.                   está totalmente cerrada.
                                                      Pulse el botón del menú
                                                      elegido. Pulse el botón de On/
                                                      off para iniciar la cocción.

                        La cesta rotativa está        Fría lotes más pequeños de
                        sobrecargada, la              alimentos.
                        temperatura es demasiado
                                                      Aumente la temperatura y el
Comida no cocinada.     baja o el tiempo de coción
                                                      tiempo de coción.
                        es muy corto.
                                                      Cocina los alimentos con un
                                                      poco de aceite.

                        La cesta rotativa está        Fría lotes más pequeños de
                        sobrecargada, la              alimentos.
Los alimentos no se
                        temperatura es demasiado
cocinan de manera                                     Aumente la temperatura y el
                        baja o el tiempo de coción
uniforme.                                             tiempo de coción.
                        es muy corto.
                                                      Cocina los alimentos con un
                                                      poco de aceite.

                        Se cocinan alimentos con      Al freír alimentos muy
                        mucha grasa o hay restos      aceitosos, es necesario
Salida de humo del
                        de grasa en las bandejas      limpiar las cestas con más
dispositivo
                        de un uso anterior.           frecuencia, después de cada
                                                      uso.

                        1.   La conexión del sensor   1.   La conexión del sensor
                             de temperatura está           de temperatura debe ser
                             suelta.                       conectada de nuevo.
Error E1
                        2.   El cable del sensor      2.   El cable del sensor tendrá
                             está dañado.                  que ser reemplazado.

                        Daños en el sensor por        El sensor tendrá que ser
                        cortocircuito.                reemplazado.
Error E2

                                                                                   17 |
SERVICIO DE ASISTENCIA TÉCNICA Y GARANTÍA
Este producto tiene una garantía de 3 años desde la fecha de compra,
siempre y cuando se conserve y envíe la factura de compra, el
producto esté en perfecto estado físico y se de un uso adecuado tal
y como se indica en este manual. Si utilizas accesorios que no sean
oficiales, se perderá la garantía.
La garantía no cubrirá:
• Si el producto ha sido usado fuera de su capacidad o utilidad,
maltratado, golpeado, expuesto a la humedad, tratado con algún
líquido o substancia corrosiva, así como por cualquiera otra falla
atribuible al consumidor.
• Si el producto no ha sido cuidado tal y como se indica en este
manual.
• Si el producto ha sido desarmado, modificado o reparado por
personas no autorizadas por el SAT oficial.
• Si la incidencia es originada por el desgaste normal debido al uso.
• Este aparato está destinado exclusivamente a uso doméstico; en
caso de que se haga un uso inadecuado del mismo, la marca no
asumirá ninguna responsabilidad y la garantía quedará anulada.
• La garantía no cubre el costo de los portes de la recogida del
producto ni de la entrega.
Si en alguna ocasión detecta una incidencia con el producto, debe
contactar con su distribuidor o con el Servicio de Asistencia Técnica
oficial y hacer llegar la factura de compra del producto vía Fax o
e-mail:
Teléfono: 965 31 31 31
e-mail: soporte@newluxgroup.com
| 18ACTIVA LA GARANTÍA
Gracias por adquirir el Horno freidora de aire Newlux Air Power y haber
depositado confianza en nuestra compañía. Cada uno de nuestros productos
tiene una garantía de 3 años desde la fecha de compra, siempre que se
cumplan los requisitos citados en el manual de instrucciones del producto.
En cualquier caso, desde Newlux recomendamos registrar el producto para
activar la garantía*.
DOS FORMAS DE ACTIVAR SU GARANTÍA:
newluxgroup.com
Imprescindible enviar una copia de la factura de compra para que la garantía
sea activada.
En caso de activar la garantía por correo postal, rellene este formulario y
envíelo:
MODELO/REFERENCIA: . . . . . . . . . . . . . . . . . . . . . . . . . . . . . . . . . . . . . . . . . . . . . . . . . . . . . . . . . . . . . . . . . ...................................................................
FECHA DE COMPRA: . . . . . . . . . . . . . . . . . . . . . . . . . . . . . . . . . . . . . . . . . . . . . . . . . . . . . . . . . . . . . . . . . . . . . ...................................................................
NOMBRE Y APELLIDOS: . . . . . . . . . . . . . . . . . . . . . . . . . . . . . . . . . . . . . . . . . . . . . . . . . . . . . . . . . . . . . . . ...................................................................
................ . . . . . . . . . . . . . . . . . . . . . . . . . . . . . . . . .. . . . . . . . . . . . . . . . . . . . . . . . . . . . . . . . . . . . . . . . . . . . . . . . . . . . . . . . . . . . . . . . . . ..................................................................
DNI: ...... . . . . . . . . . . . . . . . . . . . . . . . . . . . . . . . . . . . . . . . . . . . . . . . . . . . . . . . . . . . . . . . . . . . . . . . . . . . . . . . . . . . . . . . . . . . . . . . . . . . ..................................................................
CORREO ELECTRÓNICO: . . . . . . . . . . . . . . . . . . . . . . . . . . . . . . . . . . . . . . . . . . . . . . . . . . . . . . . . . . . . . . ..................................................................
TELÉFONO: . . . . . . . . . . . . . . . . . . . . . . . . . . . . . . . . . . . . . . . . . . . . . . . . . . . . . . . . . . . . . . . . . . . . . . . . . . . . . . . . . . . . . . . . . . ...................................................................
* Activación válida sólo para España.
En cumplimiento de la normativa vigente en materia de Protección de Datos Personales
le informamos de la incorporación de sus datos de carácter personal, necesarios para
el desarrollo de nuestra relación comercial, a nuestros ficheros inscritos en la Agencia
Española de Protección de Datos a nombre de Mark Joint Venture S.L.
Podrá ejercer sus derechos de acceso, rectificación, cancelación y oposición dirigiendo
un e-mail a soporte@newluxgroup.com, o una carta a Avenida del Rodalet, nº2, 03690,
San Vicente del Raspeig (Alicante), especificando claramente la dirección que desea
dar de baja.ENGLISH
Air Fryer Oven
Newlux Air Power V120SAFETY INSTRUCTIONS
WARNING: Hot surface, risk of burns
Accessible surfaces will reach very high temperatures during and
after use. Therefore, only touch it by the door handle and the control
panel. If necessary, use oven gloves. In addition, hot steam may
escape from the air outlet, so keep a certain distance.
Before you start
• Do not immerse any electrical parts of the appliance in liquids.
• Children must not operate the unit. Do not allow children to handle
the appliance, since it produces high temperatures and expels
steam, which could be dangerous.
• Do not turn on the appliance if it has any damaged parts. Contact
the retailer or the Technical Assistance Service (TAS).
• The included accessories may only be used with the Newlux Air
Fryer, otherwise they may be irreparably damaged.
• Do not expose the appliance to sunlight or weather elements.
• Do not use the appliance on or near heat sources such as ovens or
ceramic hobs, since this could damage the appliance.
• Do not use the appliance for functions not indicated in this manual.
• When the appliance is in operation, do not get close to the vents,
since hot steam is expelled from the appliance and could be
dangerous.
• Make sure that the voltage of the appliance is correct before
connecting it.
• Do not tamper with the safety switch.
• Do not use the appliance with an external timer.
• Do not use power strips since the appliance has a high power
rating.
• Unplug the appliance from the power socket when not in operation,
during assembly or disassembly and before cleaning. Allow it to
cool down before assembling or removing the parts and before
cleaning.
| 22EN
IMPORTANT! In order to disinfect any harmful substances, it is advisable
to carry out an initial cleaning of the appliance and its accessories. To
do this, the housing should be washed thoroughly by hand with a slightly
damp cloth and the accessories (dishwasher safe) with hot water. Do
not use detergents or objects that may scratch the appliance.
Safety in use
• Place the Newlux Air Fryer Oven on a flat, stable, heat-resistant
surface. Keep away from areas that may be affected by steam
(such as walls and cupboards).
• Leave a space of at least 20 cm behind and above the oven.
• Do not cook with the Newlux Air Fryer Oven if the door is not properly
closed. The appliance will not work.
• Do not unplug from the power outlet while the oven is cooking.
• Do not touch hot surfaces, use the door handle to open the oven.
• Do not use the oven for purposes other than cooking.
• Do not block the ventilation grille with rags or other objects, since
this could damage the motor.
• Be careful when opening the oven door as it may contain steam
or hot air.
• The Newlux air fryer oven panel is tactile, DO NOT TOUCH it with wet
hands.
• Do not move the oven when it is hot or contains hot food. Let it cool
down before moving it.
Warnings and advice
• Keep the inside of the oven and accessories clean at all times to
avoid unpleasant odours and flavours.
• This is an air fryer oven, do not overfill the rotating basket. Make
sure that the food has enough space.
• To make the food crispier, coat it with a little oil.
• Do not place anything on top of the appliance while it is operating
or hot.
• Do not disassemble the Newlux air fryer. In case of tampering with
the fryer the warranty will be void.
23 |CHARACTERISTICS
• Air Power 360° Technology: Cook your favourite food crispy, tasty
and healthy without oil thanks to its 360° hot air technology. Its
innovative system distributes the heat evenly, enveloping the food
from all angles and distributing the temperature evenly.
• Extra-large 12L capacity: Cook for the whole family, cook up to 10
portions at the same time thanks to its 12 litre capacity.
• Much more than just an oven, 12 accessories included: Thanks to
its exclusive accessories you can cook several foods at the same
time, grill skewers, cook several pizzas, dehydrate fruits, make roast
chicken and cook without limits. Includes 2 perforated trays for
dehydrating and cooking at various heights, 1 roasting or drip tray,
6 skewers, 1 rotating basket, 1 carving tray, 2 fixings and 1 grill handle
to remove the accessories safely without burning yourself. BPA,
PTFE and PFOA free. Dishwasher safe.
• Rotating basket: Includes an innovative system to rotate the food
360° and cook it evenly, get your chicken grilled to perfection and
your fries crispy on every side, improving the result of static air
fryers.
• Infinity 9+1 Multifunction: Enjoy cooking endless recipes as far as
your imagination can take you thanks to its 9+1 automatic functions:
Fry, Bread, Pizza, Steak, Fish, Dehydrate, Chicken, Dessert and Rotate.
In addition, it includes the new functions of heating and reheating
your dishes, to prevent water loss and preserve their original flavour
at any time. It also includes the new rotating function.
• Healthy foodEN
• LED touch screen and interior light, total control: Innovative
digital touch control system for simple, fast and intuitive operation.
Includes an internal light to monitor the status of the food at all
times.
• Extremely easy to use: Put the ingredients in the oven, select the
desired programme and enjoy your time, the appliance does not
require supervision.
• Quality and safety: The deep fryer oven is designed with high
quality materials and has safety systems against overheating. It
has a non-slip base to facilitate its support during operation.
• Elegant, exclusive and compact design: Product designed to be
a decoration element in your kitchen, compact and elegant with
exclusive materials.
• Technical data: Material: BPA-free plastic + stainless steel
Dimensions: 355*330*300 mm.
Weight: 6.5 Kg. (without accessories)
Servings: 10
Power supply: 220-240V, 50/60Hz
Power rating: 1500 W
Capacity: 12L
Cable length: 1m.
Temperature: 40-210°C
Timer: 1-90 min.
Dehydrate menu 1-24h.
25 |PARTS AND ACCESSORIES
Air inlet Vent grill
(rear)
Control panel
Housing
Release button
Door handle
Door
Carving/ rotating
basket support
Rail
3 x Tray 1 x Rotating basket 1 x Grill catcher handle
6 x Skewer Carving tray + 2 x Fixing
| 26EN
MENUS AND CONTROL PANEL
The door of the appliance must be closed before the appliance can be
turned on.
When plugged in, the display is shown for 1 second, then the panel
disappears, leaving only the On/Off button visible, thus activating the
Standby mode.
o
C
MIN
Functions
ON/OFF: Press this button to turn on the appliance. The oven will
beep once. The Fry menu and the On/Off button will flash for 1 minute.
After 1 minute (approx.) of non-use, the oven will go into stand-by mode.
Press this button to start the cooking process, all menus (except the
selected one) and the Reheat button will disappear.
If during cooking you need to change the temperature or time, press
the [+] or [-] button, thus changing the settings you need.
TIMER: The timer is used to set the cooking time, it can be set from 1
to 90 minutes, except in the Dehydrate menu which is from 1 to 24 hours.
Use the [+] buttons to increase the temperature and [-] to decrease it.
In each menu you can adjust the time. Pressing the [+] and [-] buttons
will change the time by 1 minute up or down.
TEMPERATURE: Press this button to adjust the temperature from 80°C
to 210°C. Use the [+] buttons to increase the temperature and [-] to
decrease the temperature.
Each menu has a default temperature setting. The temperature
increases in 5°C increments when pressed briefly.
27 |LIGHT: Use this button to turn on and off the light inside the appliance.
The light will turn off automatically after 2 minutes. It will turn on when
you open the oven door.
ROTATE: Use this button to rotate in roast function and for the
rotating basket.
When the light is on the button will flash and when the light is off it will
remain turned on.
MENUS: The selected menu will flash simultaneously with the On/Off
button until the latter has been pressed in order to start the preparation.
The time and temperature for the 10 default menus are the following:
Menú Temperatura (ºC) Tiempo (min)
Preheat 140 6
Frying 200 20
Pizza 150 12
Bread 165 15
Steak 180 15
Fish 160 12
Dehydrate 40 120
Chicken 180 30
Desserts 160 35
| 28EN
USE AND OPERATION
Cooking with Newlux Air Power is very simple, just place the ingredients,
set the menu (time and preset temperature) and wait for the oven to
cook for you.
It is advisable to preheat the oven before placing the food, unless
it is already hot from a previous cooking cycle. Preheating saves
cooking time and improves the texture of the cooked food.
When cooking with your air fryer, please take into account:
• If the door is not closed, the oven will not work.
• Do not overfill the basket.
• For a better result and for crispy food, you can glaze it with a little
oil.
• Do not cook food containing a lot of fat in the appliance.
• Frozen foods or soups should be prepared in suitable containers.
• When baking foods such as bread or cakes, the expansion of the
dough must be taken into account.
• It is advisable to soak the potatoes in water for at least 30 minutes
to reduce the starch and then dry them well with paper.
• Cooking time depends on factors such as size, temperature, quality
of the food, etc.
• Add an extra 3 minutes cooking time if you do not preheat the oven
before use.
• Before cooking steaks or large quantities of meat in the oven, it is
advisable to cook them first in a frying pan.
IMPORTANT! If you overfill the basket, the food will not cook properly.
29 |How to cook
1. Select the Preheat menu to preheat the oven (without food).
2. Once the oven is hot, place the food in the oven.
3. Select the desired menu by pressing the chosen menu button.
The menu will flash simultaneously with the On/Off button until
the latter has been pressed in order to start the preparation. The
control panel will display the default temperature and time.
4. Select the temperature by pressing the [+] or [-] buttons. It is
recommended to follow the temperature settings shown in the
menu and control panel section.
5. Select the cooking time by pressing the [+] and [-] buttons which
increase or decrease by 1 minute each time you press each button.
It is recommended to follow the times shown in the menus and
control panel section.
6. Once the menu, time and temperature have been selected, press
the On/Off button to start cooking.
7. Once the cooking process has started, you can modify the
temperature and time settings by pressing the [+] and [-]
temperature or time buttons to make the adjustments you need.
8. At the end of the cooking time, the fan will continue to run until the
appliance cools down. Then OFF will flash on and off on the display.
After approximately 20 seconds, the appliance will beep 3 times
and the OFF light will turn off and the oven will return to stand-by
mode.
9. If you have used the rotating basket or the carving tray during
cooking, remove the basket or carving tray with the grill handle.
Unlock the basket or carving tray using the release button. If you
have used the trays, remove them and place them on a heat-
resistant surface.
IMPORTANT: When removing food be careful with hot steam and
NEVER touch the appliance during and after its operation since the
temperature will be very high. Use oven gloves if necessary.
| 30EN
Cooking with the rotating basket
1. Open the door.
2. Place the grease tray in the lower part of the oven.
3. Secure the frying basket with the roasting rack/rotating basket.
Open the lid of the frying basket by turning it in the direction of the
icon on the lid. Remove the lid and add the food of your choice.
4. Close the lid of the basket by turning it in the direction of the
icon on the lid.
5. Lift the rotating basket with the help of the grill handle and slide it
onto the rails. Press the release button and move the basket to the
end of the rail. Then release the release button and the basket will
lock into place.
Cooking with carving tray and fasteners
1. Open the door.
2. Place the grease tray in the lower part of the oven.
3. Coat the carving tray and fasteners with oil.
4. Prepare the bird before roasting by tying the wings and thighs
close to the body.
5. Carefully insert the pre-prepared meat into the carving tray. Push
the fasteners onto the carving tray and fix them to the meat. Screw
the fasteners with the screws.
6. Lift the prepared meat onto the rails with the help of the grill handle.
Press the release button in the direction of the arrow and slide it to
the end of the rail. Then release the release button and the carivng
tray will lock into place.
IMPORTANT: Do not grill a large piece of meat since it must be kept
at a considerable distance from the top wall of the oven.
Cooking with trays
1. Open the door and slide the tray onto the rails.
IMPORTANT: If you put two trays in the oven, switch their positions
as the food on the upper tray will cook before the food on the lower
tray.
31 |CLEANING AND MAINTENANCE To avoid electric shock or damage to your air fryer oven, always unplug the power cord from the electrical outlet before cleaning. Make sure the oven has cooled down completely. Do not immerse the power cord or your oven in water or any other liquids or use abrasive cleaners or scouring pads. Clean the outside and inside of the oven with a soft, slightly damp cloth. Dry all parts thoroughly after cleaning, before use or before storing the oven. Make sure that all parts and surfaces are completely dry before connecting the oven to a power outlet. Wet parts may cause an electric shock. Accessories Wash them with warm water and a non-abrasive sponge. They are dishwasher safe. We recommend rinsing them and removing any dry food residue before washing them in the dishwasher. These baskets have a non-stick coating. Do not use metal utensils and abrasive cleaning materials to avoid damage. For stubborn grease mix 118 ml of baking soda and a few tablespoons of water in a small bowl to form a spreadable paste. With a soft sponge, spread the paste over the fryer baskets and rub gently. Leave for about 15 minutes before rinsing. Then wash with soap and water before using again. Always make sure they are dry before use. | 32
EN
SECURITY SYSTEM
The Newlux air oven is a revolutionary appliance in terms of safety
systems. It has different interlinked systems that act simultaneously
and prevent any failure from occurring.

The oven turns off automatically when the door is opened. It will not
operate if the door is not properly closed. Once it has been closed
again, it resumes automatically with the remaining time and the
current settings.

                                                                 33 |
PROBLEM SOLVING
Problem Possible cause Solution
The oven is not plugged in. To
start, press the on/off button.
The oven is not
plugged in, the door Make sure that the door is fully
The oven does not work.
is not closed or the closed. Press the button for the
appliance is defective. chosen menu. Press the On/off
button to start cooking.
The rotating basket Fry smaller batches of food.
is overloaded, the
Uncooked food. Increase the temperature and
temperature is too low
cooking time.
or the cooking time is
too short. Cook food with a little oil.
The rotating basket Fry smaller batches of food.
is overloaded, the
Food is not cooked evenly. Increase the temperature and
temperature is too low
cooking time.
or the cooking time is
too short. Cook food with a little oil.
Greasy food is being When frying very oily food,
cooked or there are it is necessary to clean the
Smoke output of the
grease residues on the baskets more frequently after
appliance
trays from previous use each use.
Error E1 1. Temperature 1. The temperature sensor
sensor connection connection must be
is loose. reconnected.
2. Sensor cable is 2. The sensor cable will need
damaged. to be replaced.
Error E2 Sensor damage due to The sensor will have to be
short-circuit. replaced.
| 34EN
FRAÇAIS
Four friteuse à air chaud
Newlux Air Power V120
35 |CONSIGNES DE SÉCURITÉ
ATTENTION: Surface chaude, risque de brûlures
Les surfaces accessibles doivent atteindre des températures très
élevées pendant et après l’utilisation de l’appareil. Par conséquent,
touchez-le uniquement par la poignée de porte et le panneau de
commande. Si nécessaire, utilisez des gants de cuisine. En outre, de
la vapeur chaude peut s’échapper de la sortie d’air, alors gardez
une certaine distance.
Avant de commencer
• N’immergez aucune partie électrique de l’appareil dans des
liquides.
• Il ne doit pas être utilisé par des enfants. Ne laissez pas les enfants
manipuler l’appareil, car il produit des températures élevées et
expulse de la vapeur, ce qui pourrait être dangereux.
• Si l’appareil comporte des pièces endommagées, ne le mettez
pas en marche. Contactez le vendeur ou le service d’assistance
technique (SAT).
• Les accessoires fournis ne peuvent être utilisés qu’avec la friteuse
à air Newlux, sinon ils peuvent subir des dommages irréparables.
• N’exposez pas l’appareil à la lumière du soleil ou aux intempéries.
• N’utilisez pas l’appareil sur ou près de sources de chaleur telles que
des fours, des plaques de cuisson ou des plaques en céramique,
car cela pourrait endommager l’appareil.
• N’utilisez pas l’appareil pour des fonctions non indiquées dans ce
manuel.
• Lorsque l’appareil fonctionne, ne vous approchez pas des grilles de
ventilation, il dégage de la vapeur chaude et peut être dangereux.
• Assurez-vous que la tension de l’appareil est correcte avant de le
brancher.
• Ne manipulez pas le commutateur de sécurité.
• N’utilisez pas l’appareil avec une minuterie externe.
• Ne pas utiliser de prises multiples car l’appareil a une grande
puissance.
• Débranchez l’appareil de la prise de courant lorsqu’il ne fonctionne
pas, pendant le montage ou le démontage et avant le nettoyage.
Laissez refroidir avant le montage ou le démontage des pièces et
avant le nettoyage.
| 36IMPORTANT! Afin de désinfecter toutes sortes de substances
FR
nocives, il est conseillé, dans un premier temps, de procéder à un
premier nettoyage de l’appareil et de ses accessoires. Pour ce faire,
la carcasse doit être lavée avec précision et à la main à l’aide d’une
peau de chamois légèrement humidifiée et avec de l’eau chaude les
accessoires (lavables au lave-vaisselle) à l’eau chaude. N’utilisez pas
de détergents ou d’objets qui irradient l’appareil.
Sécurité d’utilisation
• Placez le four friteuse à air chaud Newlux sur une surface plane,
stable et résistante à la chaleur. Gardez-le loin des zones qui
peuvent être affectées par la vapeur (comme les murs et les
armoires).
• Laissez un espace d’au moins 20 cm derrière et au-dessus du four.
• Ne cuisinez pas avec le four friteuse à air chaud Newlux si la porte
n’est pas correctement fermée. L’appareil ne fonctionnera pas.
• Ne débranchez pas la prise de courant pendant la cuisson.
• Ne touchez pas les surfaces qui sont chaudes, utilisez la poignée de
porte pour ouvrir le four.
• N’utilisez pas le four à d’autres fins que la cuisson.
• N’obstruez pas la grille de ventilation avec des chiffons ou d’autres
objets, cela pourrait endommager le moteur.
• Soyez prudent lorsque vous ouvrez la porte du four car il peut y
avoir de la vapeur ou de l’air chaud.
• Le panneau du four friteuse à air chaud Newlux est tactile, NE PAS
TOUCHER avec les mains mouillées.
• Ne déplacez pas le four chaud ou lorsqu’il contient des aliments
chauds. Laissez-le refroidir avant de le déplacer.
Avertissements et conseils
• Gardez l’intérieur du four et les accessoires toujours propres, afin
d’éviter les mauvaises odeurs et les mauvaises saveurs.
• Il s’agit d’un four friteuse à air, ne remplissez pas trop le panier
rotatif.Assurez-vous que la nourriture ait suffisamment d’espace.
• Pour rendre les aliments plus croustillants, imprégnez-les d’un peu
d’huile.
• Ne placez rien sur l’appareil pendant qu’il fonctionne ou qu’il est
chaud.
• Ne démontez pas le four friteuse à air chaud Newlux. En cas de
manipulation du four, il sera exclu de la garantie.
• Do not disassemble the Newlux air fryer. In case of tampering with
the fryer the warranty will be void.
37 |CARACTÉRISTIQUES
• Technologie Air Power 360º: Cuisinez vos aliments préférés de
façon croustillante, savoureuse et saine sans huile grâce à sa
technologie d’air chaud à 360º. Son système innovant distribue la
chaleur de façon homogène, en enveloppant les aliments sous tous
les angles et en répartissant la température de façon uniforme.
• Capacité extra-grande de 12L: Cuisinez pour toute la famille, vous
pouvez cuisiner jusqu’à 10 rations en même temps grâce à sa
capacité de 12 litres.
• Bien plus qu’un four, 12 accessoires inclus: Grâce à ses accessoires
exclusifs, vous pouvez cuisiner plusieurs aliments en même temps,
griller des brochettes, cuire plusieurs pizzas, déshydrater des fruits,
faire du poulet rôti et cuisiner sans limites. Comprend 2 plateaux
perforés pour déshydrater et cuire à différentes hauteurs, 1 plateau
de rôtissage ou d’égouttage, 6 brochettes, 1 panier rotatif, 1 broche
pour four, 2 fixations et 1 poignée de gril pour retirer les accessoires
en toute sécurité sans se brûler. Sans BPA, PTFE et PFOA. Lavable au
lave-vaisselle.
• Panier rotative: Comprend un système innovant pour faire pivoter
les aliments à 360° et cuire uniformément, obtenez votre poulet rôti
parfait et vos frites croustillantes dans chaque coin, améliorant le
résultat des friteuses à air statique.
• Multifonction Infinity 9+1: Cuisinez une infinité de recettes au gré
de votre imagination grâce à ses fonctions automatiques 9+1: Frire,
Pain, Pizza, Steak, Poisson, Déshydrater, Poulet, Dessert et Rotation.
De plus, il intègre les nouvelles fonctions pour chauffer et réchauffer
vos plats, pour éviter la perte d’eau et préserver à tout moment sa
saveur d’origine. Inclut également la nouvelle fonction rotative.
• Aliments sains• Puissance maximale 1500W: Sa grande puissance permet de
FR
cuire les aliments en place rapidement.
• Contrôle de la température et du temps: Réglez la température de
cuisson de façon précise, de 40 à 210oC. Sélectionnez le temps de
cuisson jusqu’à 90 minutes ou 24h de déshydratation.
• Écran LED tactile et éclairage intérieur, contrôle total: Système
innovant de commande numérique tactile pour une utilisation
simple, rapide et intuitive. Comprend une lumière interne pour
contrôler à tout moment l’état des aliments.
• Extrêmement facile à utiliser: mettez les ingrédients dans le four,
sélectionnez le programme souhaité et profitez de votre temps, le
produit n’a pas besoin de supervision.
• Qualité et sécurité: Le four friteuse est conçu avec des matériaux de
haute qualité et dispose de systèmes de sécurité contre la chaleur
excessive. Il dispose d’une base antidérapante pour favoriser son
maintien en fonctionnement.
• Design élégant, exclusif et compact: Produit conçu pour être
un élément supplémentaire de décoration dans votre cuisine,
compact et élégant avec des matériaux exclusifs.
• Données techniques:
Matériau: plastique sans BPA + acier inoxydable
Dimensions : 355*330*300 mm.
Poids : 6,5 Kg. (Sans accessoires)
Rations : 10
Alimentation : 220-240V, 50/60Hz
Puissance : 1500W
Capacité : 12L
Longueur du câble : 1 m.
Température : 40-210ºC
Minuterie : 1-90 min.
Menu déshydrater 1-24h.
39 |PIÈCES & ACCESSOIRES
Ouverture d’entrée d’air Grille de
ventilation
Panneau de commande (à l’arrière)
Carcasse
Bouton de relâchement
Poignée de porte
Porte
Plateau pour broche pour
four /panier rotatif
Rail
3 x Plateaux 1 x Panier rotatif 1 x Poignée de
ramassage du gril
6 x Brochette Broche pour four et
fixateurs + 2 x Fixateur
| 40MENUS ET PANNEAU DE COMMANDE
FR
La porte de l’appareil doit être fermée pour que celui-ci puisse s’allumer.
Lorsque vous le branchez, l’écran s’affiche pendant 1 seconde, puis le
panneau disparaît en laissant seul le bouton On/Off visible, activant
ainsi le mode Stand by.
o
C
MIN
Fonctions
ON/OFF: Appuyez sur ce bouton pour allumer le produit. Le four
émettra un bip. Le menu Faire frire et le bouton On/Off clignoteront
pendant 1 minute.
Après 1 minute (approximativement) sans utilisation, le four passe en
mode Stand by.
Cliquez sur ce bouton pour commencer la cuisson, tous les menus
(sauf celui choisi) et le bouton Reheat “Réchauffer” disparaîtront.
Si vous avez besoin de changer la température ou le temps pendant
la cuisson, appuyez sur [+] ou [-] pour modifier les réglages dont vous
avez besoin.
MINUTERIE: La minuterie sert à régler la durée de cuisson, elle peut
être réglée entre 1 et 90 minutes, sauf dans le menu Déshydrater qui
comprend 1 à 24 heures. Utilisez les boutons [+] pour augmenter la
température et [-] pour la diminuer.
Dans chaque menu, vous pouvez régler l’heure. Lorsque vous appuyez
sur les boutons [+] et [-] le temps varie d’une minute vers le haut ou
vers le bas.
TEMPÉRATURE: Appuyez sur ce bouton pour régler la température de
80oC à 210oC. Utilisez les boutons [+] pour augmenter la température
et [-] pour la diminuer.
41 |Chaque menu a par défaut une température définie. La température
augmente par intervalles de 5°C lorsque vous appuyez brièvement.
ÉCLAIRAGE: Utilisez ce bouton pour allumer et éteindre la lumière à
l’intérieur de l’appareil. L’éclairage s’arrête automatiquement au bout
de 2 minutes. D’autre part, vous disposerez de celle-ci en ouvrant la
porte du four.
PIVOTER: Utilisez ce bouton pour faire pivoter la fonction de rôtissage
et pour le panier rotatif.
Lorsque la lumière est allumée, le bouton clignote, tandis que lorsqu’il
est éteint, il reste fixe.
MENUS: Le menu choisi clignotera simultanément avec le bouton
On/off jusqu’à ce que ce dernier ait été appuyé afin de démarrer la
préparation.
L’heure et la température correspondant aux 10 menus par défaut sont
les suivantes:
Menu Température (ºC) Temps (min)
Préchauffer 140 6
Frire 200 20
Pizza 150 12
Pain 165 15
Bifteck 180 15
Poisson 160 12
Déshydrater 40 120
Poulet 180 30
Desserts 160 35
| 42UTILISATION ET FONCTIONNEMENT
FR
Cuisiner avec Newlux Air Power est très simple, il vous suffit d’entrer
les ingrédients, de programmer le menu (temps et température par
défaut) et d’attendre que le four cuise pour vous.
Il est conseillé de préchauffer les aliments avant de les placer, à
moins qu’ils ne soient déjà chauds par un cycle de cuisson antérieur.
Le préchauffage permet d’économiser du temps de cuisson et
d’améliorer la texture des aliments cuits.
Pour cuisiner avec votre four friteuse à air, gardez à l’esprit:
• Si la porte n’est pas fermée, le four ne fonctionnera pas.
• Ne remplissez pas trop le panier.
• Pour un meilleur résultat et que la nourriture soit croustillante vous
pouvez la vernir avec un peu d’huile.
• Ne faites pas cuire des aliments contenant beaucoup de graisse
dans l’appareil.
• Les aliments surgelés ou les soupes doivent être préparés dans
des récipients appropriés.
• Lors de la cuisson des aliments comme le pain ou les gâteaux, il
faut tenir compte de l’expansion de la pâte.
• Il est conseillé de laisser tremper les pommes de terre avec de
l’eau pendant au moins 30 minutes pour réduire l’amidon, puis de
les sécher soigneusement avec du papier.
• Le temps de cuisson dépend de facteurs tels que la taille, la
température, la qualité des aliments, etc.
• Ajoutez 3 minutes supplémentaires à la cuisson si vous ne
préchauffez pas le four avant de l’utiliser.
• Avant de cuire du steak ou de grandes quantités de viande au four,
il est conseillé de les faire d’abord dans une poêle.
ATTENTION! Si vous remplissez trop le panier, les aliments ne seront
pas cuits correctement.
43 |También puede leer