User Technical Manual Manual Técnico de Usuario
←
→
Transcripción del contenido de la página
Si su navegador no muestra la página correctamente, lea el contenido de la página a continuación

User Technical Manual

Manual Técnico de Usuario
                                                 ©

                                              ACTIVATE YOUR
                                              WARRANTY

                                              Find the serial
                                              number on the
                                              center of the base.

 ACTIVA TU GARANTÍA. Encuentra el
 número de serie en el centro de la base.

TWS-001

CAUTION                                                     HEAVY
 READ DE MANUAL                                          GRINDING STONES
 · THE MACHINE MUST NOT BE USED BEFORE
 READING THE OPERATING MANUAL                            KEEP HANDS
 TO AVOID FATAL OR SERIOUS INJURY: READ THE
 MANUAL FIRST
                                                            CLEAR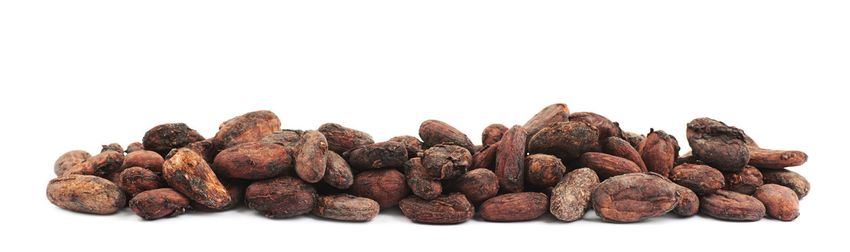
ATENCIÓN: MUY IMPORTANTE                                       ATTENTION: VERY IMPORTANT
Lea detenidamente estas instrucciones                          Read these instructions carefully

TWIN STONES está pensada para refinar productos remojados      TWIN STONES is specially designed to refine products
o bien que tengan un importante contenido acuoso o             that are soaked or have a significant water or fat content.
graso. No obstante, es capaz de refinar e integrar pequeñas    However, it is capable of refining and integrating small
cantidades de frutos secos (pistachos, avellanas, nueces,      quantities of nuts (pistachios, hazelnuts, walnuts, almonds,
almendras, anacardos…), o semillas oleaginosas previamente     cashew nuts...), or oil seeds previously ground or of a very
molidas o de muy pequeño tamaño como el sésamo,                small size such as sesame, legumes like peanuts, spice
legumbres como el cacahuete, especias en polvo…, en            powders..., in additives such as sugars, honeys, oils or lard.
añadidos como azúcares, mieles, aceites o mantecas. Todos      All these dry products must be incorporated, previously
estos productos secos deben irse incorporando, previamente     ground, little by little. The maximun quantity must be 1 kg.
molidos, poco a poco y como máximo debe ser 1 kg.
Otros productos en polvo siempre deberán trabajarse con        Other powdered products should always be worked with
algún producto cremoso como por ejemplo chocolate u            some creamy product such as chocolate or others.
otros.
Debemos notificarles que trabajar productos secos o duros,     Please, be aware that working with dry or hard products,
sin liquido u otros componentes fluidos, pueden desgastar      without liquid or other fluid components, can wear out the
las piedras o los encajes del tambor.                          stones or the laces on the drum.

Twin Stones no es un molinillo o una refinadora                Twin stones is not a grinder or a refiner with
con cuchillas.                                                 blades.

La garantía no cubre el desgaste o deterioro de sus piezas o   The warranty does not cover wear or deterioration of its parts
componentes.                                                   or components.

                              Cocina Sin Límites, S.L.            www.100x100chef.com                                      1
Estimado cliente, ¡Enhorabuena!                         Dear Customer, Congratulations!
      Gracias por comprar la conchadora Twin Stones.          Thank you for buying Twin Stones Wet Grinder.

      Las conchadoras se fabrican, prueban y embalan          Our Wet Grinders are carefully manufactured, tested
      cuidadosamente para ofrecerle un rendimiento            and packed so as to give you optimal performance.
      óptimo. 100%Chef destaca por ser una referencia para    That’s why 100%Chef is a trusted name in
      la cocina profesional en más de 60 países.              professional kitchen appliances with customers
      Estamos seguros de que la conchadora Twin Stones        worldwide.
ENG

      le proporcionará una nueva forma de producir            We are sure that Twin Stones Wet Grinder will help
      ingredientes con increíbles resultados. Desde las       you to craft incredible ingredients and results. From
      pastas de frutos secos hasta mermeladas, mostazas       nuts pastes, until marmalades, mustard, flavored
      o chocolates de distintos sabores. Produzca patés,      chocolates. Make your own pâté, fine fish paste and
ESP

      pastas finas de pescado y como no, desarrolle sus       develop your own recipes of bean-to-bar chocolate.
      propias recetas de chocolate bean-to-bar.
      Reduzca el tiempo que pasa en la cocina mientras        Reduce the time you spend in the kitchen, making
      obtiene alimentos únicos y sabrosos.                    unique and delicious preparations.

      Por favor, lea atentamente el manual de instrucciones   Please read the instruction manual carefully before
      antes de su uso y manténgalo siempre en su poder.       use and keep it handy.

      2                       Cocina Sin Límites, S.L.           www.100x100chef.com
Muy importante - Very Important Notes

 Nota: Compruebe que el voltaje es el indicado para su máquina

  Por favor, NO UTILICE LA CONCHADORA PARA MOLER EN SECO.

  Como medida de seguridad, no manipule el enchufe eléctrico y el interruptor con las manos
  mojadas. Por favor, asegúrese de que el cableado eléctrico tenga una toma de tierra adecuada.

                                                                                                        ENG
  NO estire del cable para retirar el enchufe de la toma.

                                                                                                        ESP
 Note: Check that the voltage is the one indicated for your machine

  Please DO NOT USE YOUR WET GRINDER FOR DRY GRINDING.

  As a safety precaution, do not handle the electrical plug and the switch with wet hands. Please
  ensure that your electrical wiring has proper earthling provision.

  DO NOT hold the wire to remove the plug from the socket.

                    Cocina Sin Límites, S.L.           www.100x100chef.com                          3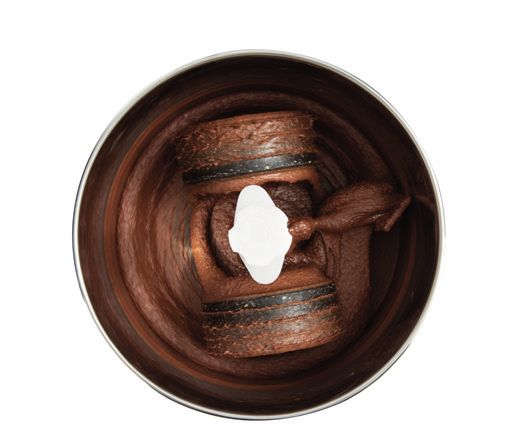
Muy importante - Very Important Notes

            Lea detenidamente el manual de instrucciones y familiarícese antes de usar la conchadora.
            Always read the instruction manual properly and familiarize yourself before using the grinder.

            Mantenga siempre el tambor en posición vertical mientras trabaja.
            Always keep the drum in a vertical position while grinding.

            Si trabaja con ingredientes secos, póngalos en remojo primero.
ENG

            If you work with dry ingredients, always soak them first.

            Utilice la tapa superior mientras la conchadora esté en uso.
            Use the top cover while the grinder machine is in use.
ESP

            Apague siempre la máquina antes de manipular la conchadora.
            Always switch off the machine before handling the grinder.

            Desconecte la conchadora de la toma de corriente mientras no esté en uso.
            Disconnect the grinder from the socket while the grinder is not in use.

            Mantenga siempre la máquina limpia y seca.
            Always keep the grinder clean and totally dry.

      4                       Cocina Sin Límites, S.L.               www.100x100chef.com
Descripción de las piezas - Description of Parts

                             1   Tapa del tambor / Drum Lid

                             2   Resorte Regulador / Top Lock Spring

                             3   Soporte para piedras 2 palas / Stone Holder 2 paddles Raspador de coco
                                                                                       Coconut Scraper
                             4   Piedras de granito (2 uds) / Granite Stone (2 pcs)

                                                                                                           ENG
                             5   Tambor de acero inoxidable / Stainless Steel Drum

                             6   Bloqueo de inclinación / Side Lock Knob

                             7   Palanca de bloqueo basculante / Tilting Lock Knob        Espátula

                                                                                                           ESP
                                                                                          Spatula
                             8   Carcasa blanca / White casing

                             9   Interruptor de sobrecarga / Overload Switch

                             10 Interruptor de encendido/apagado / On/Off Switch

                             11 Base / Bottom Unit                                    Pala Amasadora
                                                                                          Kneader
                             12 Indicador de encendido / Power Indicator

                Cocina Sin Límites, S.L.              www.100x100chef.com                              5
Instrucciones básicas de funcionamiento - Basic Operating Instructions

                                                                     Para sacar el                                        Levante y sacar el conjunto
           1                                 2                       tambor de la              4                          de las piedras (Importante:
                                                                     unidad base.                                         Mantenga las piedras sobre
                                                                     Retire la tapa                                       una superficie plana con
                                                                     del tambor.                                          cuidado y asegúrese de que
                                                                                                                          permanezca inmóvil en esa
                                                                                                                          posición).

               El tambor debe estar
               en posición vertical               To take out the drum from the base unit.         Lift and take out the roller assembly (Important:
               con la palanca de
ENG

                                                  Take off the drum lid from the drum.             Keep the roller on a flat surface carefully and
               bloqueo de inclinación                                                              ensure that it stays stationary in that position).
               y el volante de bloqueo
               debidamente apretadas.

                                                                     Desenrosque el bloqueo                               Ahora se puede sacar
               The drum must be in          3                        superior                  5                          el tambor simplemente
ESP

               a vertical position with                                                                                   levantándolo del eje.
               the tilting lock knob                                 Unscrew the top
               and lock knob properly                                lock with spring and                                Now you can take out
               tightened.                                            take it out.                                        the drum just by lifting
                                                                                                                         out of the spindle.

                                                                         HEAVY
                                                                      GRINDING STONES

                                                                      KEEP HANDS
                                                                         CLEAR

                    Nota: Limpie el tambor y las piedras con un estropajo suave antes de volver a montarlo en la base.

          Note: Clean the drum and the roller stone assembly with a standard soft brush before re-assembling it into the base unit.

      6                                   Cocina Sin Límites, S.L.                      www.100x100chef.com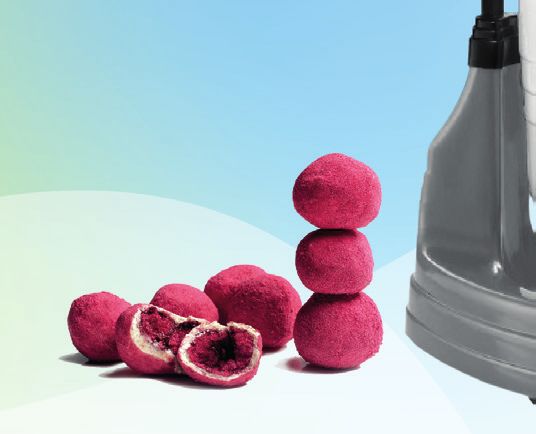
Instrucciones básicas de funcionamiento - Basic Operating Instructions

DIRECTRICES para volver a montar el tambor con la unidad base
GUIDELINES for re-assembling the drum with the base unit

               Colocar el tambor en el centro sobre la unidad base. Deslizarlo suavemente
               por el eje hasta que esté en contacto con la base.

               Place the drum in the center over to the base unit. Slide it down the
               projecting spindle gently until it is in contact with the base unit.

                                                                                                           ENG
               Girar ligeramente el tambor en cualquier dirección hasta que el acoplador situado
               en el eje saliente de la unidad base y el acoplador en la parte inferior de la unidad
               estén alineados.

                                                                                                           ESP
               Slightly rotate the drum in any direction until the coupler provided
               at the projecting spindle of the base unit, and the coupler in the
               bottom of the unit are aligned.

               En esta posición, presionar el tambor hacia abajo hasta que encaje en la base.

               In this position, press down the drum until it gets seated at the
               bottom of the base unit.

                    Cocina Sin Límites, S.L.           www.100x100chef.com                             7
Instrucciones básicas de funcionamiento - Basic Operating Instructions

          Fijación del conjunto de rodillos dentro del tambor / finxing up the roller assembly inside the drum

                           Deslice el conjunto de rodillos sobre el eje hasta que el conjunto de rodillos
                           se asiente en la base.

                           Place the drum in the center over to the base unit. Slide it down until
                           the roller assembly sits on the base.
ENG

                           Gire ligeramente el conjunto de rodillos en cualquier dirección en esta posición, hasta
                           que el agujero cuadrado del conjunto de rodillos y el cuadrado del eje estén alineados.
ESP

                           Slightly rotate the drum in any direction until the coupler provided at
                           the projecting spindle of the base unit, and the coupler in the bottom
                           of the unit are aligned.

                           En esta posición, el conjunto de rodillos encajará en los cuadrados con un ligero clic.

                           In this position, press down the drum until it gets seated at the bottom of the
                           base unit.

      8                      Cocina Sin Límites, S.L.           www.100x100chef.com
Instrucciones básicas de funcionamieto - Basic Operating Instructions
Fijación de la cerradura superior / Fixing up the top lock
Atornille el bloqueo superior sin hacer mucha fuerza en el eje de la base.
Aconsejamos que al trabajar con frutos secos o duros en los primeros 10 minutos
el tornillo no esté apretado.
Screw the top lock into the projecting shaft of the base unit without
ENG
using almost any strenght.
ESP
Cierre el tambor con la tapa. La tapa no cierra herméticamente: se apoya sobre el
tornillo de sujeción. Esta tapa protege del polvo, pero deja salir los vapores de la
mezcla cuando se calienta.
Close the drum with the lid. The cover does not close tightly: it rests on
the retaining screw. This cover protects against dust, but allows mix
vapours to escape when heated
La conchadora está lista para usar / Now your grinder is ready to use
Cocina Sin Límites, S.L. www.100x100chef.com 9Instrucciones básicas de funcionamiento - Proceso de Molienda
Asegúrese de que el suministro eléctrico esté desconectado de la conchadora y
que el voltaje es el idóneo para la máquina
Conecte la máquina a la red.
Por razones de seguridad, evite manipular el enchufe con las manos mojadas.
Sujete siempre el enchufe para extraerlo de la toma,
NO tire del cable para extraer el enchufe de la toma.
Abra la tapa del tambor. Vierta una taza de agua en el tambor.
Agregue una pequeña cantidad del contenido que tiene que ser molido.
ESP
Encienda el molinillo. Agregue gradualmente el contenido al tambor.
Observe la consistencia del contenido dentro del tambor y agregue algo de líquido si es necesario.
Cuando la molienda se haya completado, apague la conchadora y desenchufe de la corriente.
10 Cocina Sin Límites, S.L. www.100x100chef.comBasic Operating Instructions - Grinding Procedure
Make sure that the power supply is disconnected from the grinder and that the voltage is
suitable for the machine.
Plug the wet grinder into a socket.
For safety precautions, avoid handling the plug with wet hands.
Always hold the plug to remove it from the socket,
ENG
do NOT pull the wire to remove the plug from the socket.
Open the lid of the drum and Pour a cupful of water into it.
Add a small quantity of the content that has to be grounded.
Switch on the grinder grounded. As the drum starts rotating, gradually add the content to the
drum.
While the grinding continues, observe the consistency of the content inside the drum and add
some liquid if required.
As soon as the grinding is completed as per your requirements, switch off the grinder and take
out the plug from the socket.
Cocina Sin Límites, S.L. www.100x100chef.com 11Instrucciones básicas de funcionamiento - Retirada de la pasta
Sosteniendo el tambor con una mano, presione la palanca de bloqueo basculante
con la otra mano y luego incline el tambor sobre el recipiente. Ahora suelte la palanca
de bloqueo de inclinación. (Nota: se oye un sonido de clic al presionar y soltar la
palanca de bloqueo de inclinación, lo que indica que la unidad no se inclinará a
menos que se presione la palanca de bloqueo de inclinación).
ENG
Después de drenar la mayor parte de la masa, presione la palanca de bloqueo de inclinación
y vuelva a colocar el tambor en posición vertical hasta que quede bloqueado con un clic.
Acto seguido apriete el volante de bloqueo lateral.
ESP
Desatornille el bloqueo superior y retire el conjunto de rodillos.
Limpie la pasta del ensamblaje del rodillo en el recipiente.
Coloque el conjunto de rodillos sobre una superficie plana con cuidado y
asegurése de que permanezca inmóvil en esa posición.
Levante el tambor de la base y vacíe el resto de la masa del tambor.
12 Cocina Sin Límites, S.L. www.100x100chef.comBasic Operating Instructions - Taking out the ground dough
Holding the drum with one hand, press the tilting lock knob with the other hand
then tilt the drum to a convenient position over the collection utensil. Now release
the tilting lock knob.
(Note: you will heard a “click” sound when you press and release the tilting lock
knob indicating that the unit will not tilt unless the tilting lock knob is pressed).
ENG
After a major portion of the ground dough is drained out, press the tilting lock knob and bring back
the tilted drum to a vertical position until it gets locked with the click sound. Tighten the side lock
knob.
ESP
Unscrew the top lock and take out the roller assembly as explained earlier.
Wipe out the sticking ground dough from roller assembly into the collection vessel.
Place the roller assembly on a flat surface carefully and ensure that it stays stationary in that
position.
Lift the drum from the base unit and wipe out the remaining dough from the drum.
Cocina Sin Límites, S.L. www.100x100chef.com 13Primer uso, mantenimiento y limpieza - First use, maintenance and cleaning
1. Antes del primer uso, colocar 200gr. de azúcar y dejar trabajar unos 10 minutos.
Before the first use, place 200gr. of sugar and let it work for about 10 minutes..
2. Después de drenar el tambor, limpie el seguro superior, los rodillos y el tambor completamente
con agua.
After draining the drum, clean the top lock, roller assembly and drum thoroughly with water.
ENG
3. Para la limpieza, retire siempre el tambor y los rodillos de la base.
Always remove the drum and rollers from the base unit for cleaning.
ESP
4. Limpie el regulador y el rodillo de piedra con un paño para evitar la humedad.
Wipe the top lock, roller assembly with a clean cloth to avoid dampness.
5. Deje secar el regulador, el conjunto de rodillos y el tambor.
Let dry the top lock, roller assembly and the drum.
6. Una vez secos, ensamble el tambor, el conjunto de rodillos y el regulador.
Assemble the drum, roller assembly and the top lock.
14 Cocina Sin Límites, S.L. www.100x100chef.comInstrucciones básicas de funcionamiento
Después de vaciarla, desconecte la máquina y el enchufe de la red.
La conchadora está equipada con un mecanismo especial que hace que sea muy
fácil inclinar el tambor:
1) Afloje el volante de bloqueo lateral.
2) Presione la palanca de bloqueo de inclinación hacia abajo e inclinarla como se muestra aquí. La
conchadora se inclina en 4 posiciones, es decir, a ambos lados.
Para volver a la posición vertical, presione la PALANCA DE BLOQUEO DE INCLINACIÓN hacia abajo
una vez más y levantántela.
3) Apriete nuevamente el volante de bloqueo lateral.
ESP
POMO LATERAL: PALANCA DE BLOQUEO BASCULANTE
PRECAUCIÓN AFLOJE EL VOLANTE PRESIONE HACIA ABAJO ESTA PALANCA
Durante el proceso DE BLOQUEO LATERAL DE BLOQUEO DE INCLINACIÓN Y
de molienda, PODRÁ INCLINAR EL TAMBOR EN
ANTES DE PRESIONAR
mantenga siempre
LA PALANCA DE CUATRO POSICIONES. PRESIONE
la máquina sólo en
posición vertical. BLOQUEO DE DE NUEVO HACIA ABAJO Y VOLVER
INCLINACIÓN. A COLOCAR EL TAMBOR
EN SU POSICIÓN VERTICAL.
Cocina Sin Límites, S.L. www.100x100chef.com 15Basic Operating Instructions
After grinding, switch off the machine and REMOVE the PLUG from the mains.
Your grinder is equipped with a special and easy mechanism to tilt the drum to
your convenient position:
1) Loosen the SIDE LOCK KNOB.
ENG
2) Press the TILTING LOCK KNOB down and tilt as shown here. You can tilt the
grinder to 4 positions i.e. on either side. To bring back to vertical position press the
TILTING LOCK KNOB down once again and lift.
3) Tighten the SIDE LOCK KNOB.
CAUTION TILTING LOCK KNOB: PRESS DOWN THIS
SIDE LOCK KNOB:
While grinding, TILTING LOCK KNOB AND YOU CAN TILT
always keep LOOSEN THE SIDE
THE DRUM TO FOUR POSITIONS. PRESS
the machine LOCK KNOB BEFORE
DOWN AGAIN AND YOU CAN BRING BACK
only in the YOU PRESS THE TILTING
vertical position. THE DRUM TO ITS VERTICAL POSITION.
LOCK KNOB.
16 Cocina Sin Límites, S.L. www.100x100chef.comConsejos básicos para algunas elaboraciones
Para producir chocolate de sabores
Para producir chocolate saborizado, derrita la cobertura de chocolate blanco a una temperatura
máxima de 45°C, insértela en la conchadora y añada el sabor en polvo siguiendo las proporciones
indicadas en la tabla. Conche durante al menos 2 horas. Añada manteca de cacao si procede.
Atempere la cobertura antes de utilizar.
Pralinés
Moler siempre los ingredientes en un molinillo. Empezar con la pasta de frutos secos y dejar
que los rodillos trabajen hasta lograr una fluidez. Añadir el azúcar molido poco a poco y dejar
conchar; añadir los otros ingredientes si fuese necesario. Tenga en cuenta que si la masa es muy
densa o fría puede dañar los engranajes de la máquina.
Para extraer pulpa de coco fresco
ESP
Fijar el raspador de coco en el eje. Comience siempre a raspar desde los lados del coco
hacia el centro.
El raspador de coco tiene cuchillas afiladas. Tenga cuidado. Asegúrese de no levantar el
raspador por la parte superior para evitar lesiones. Levante siempre el raspador desde el
centro.
Amasado
Fije la pala de la amasadora en el eje. Ponga 500 g (máximo) de harina con un poco de sal
y encienda la máquina. Añada una cucharadita de aceite para evitar que la masa se pegue
a la hoja de la amasadora y al tambor. Añada agua lentamente hasta que la masa alcance
la consistencia deseada.
Cocina Sin Límites, S.L. www.100x100chef.com 17Basic tips for some elaborations
To produce flavored chocolate
To produce flavored chocolate, melt the white couverture chocolate at a maximum temperature
of 45°C, pour in the wet grinder and add the powdered flavor.
Conche for at least 2 hours. Add cocoa butter if necessary. Temper the coating before use.
Pralines
Always grind the ingredients in a grinder. Start with the dried fruit paste and let the machine
work until get a smoothy texture. Add the powdered sugar little by little and keep the machine
working; add the other ingredients if necessary. Note that if the dough is too thick or cold, it can
ENG
damage the gears of the machine.
For scraping coconuts
Fix the coconut scraper on the center shaft. Always begin your scraping from the sides of
the coconut towards the center.
Note:
· The coconut scraper has sharp blades for scraping.
· Make sure that you do not lift the scraper from the top to avoid injuries. Always lift the
scraper from the middle.
Dough kneading
Fix the dough kneader blade on the center shaft. Put 500 g (max) of flour with a little salt
and switch on the machine. Add a teaspoon of oil to avoid the dough from sticking to
the kneader blade and the drum. Add water slowly until the dough attains the required
consistency.
18 Cocina Sin Límites, S.L. www.100x100chef.comPrecauciones
No haga funcionar la conchadora sin carga durante más de unos segundos.
HEAVY
No ponga las manos dentro del tambor mientras la conchadora esté funcionando. GRINDING STONES
KEEP HANDS
CLEAR
Mantenga fuera del alcance de los niños.
No sobrecargue el motor con más de dos litros de ingredientes, añádalos poco a poco.
No guarde alimentos ni ningún otro artículo en el tambor mientras no esté en uso.
No sumerja el cable eléctrico, el enchufe ni ninguna parte de la conchadora en agua.
ESP
No levante o mueva la máquina cuando esté en funcionamiento.
No toque el tambor en marcha durante el funcionamiento.
No utilice ningún otro accesorio con la conchadora excepto los proporcionados por el fabricante.
No intente reparar la conchadora en casa ni permita que una persona no autorizada la repare.
Póngase en contacto con el distribuidor de 100%Chef más cercano para obtener soporte técnico.
Cocina Sin Límites, S.L. www.100x100chef.com 19Don’ts
Do not run the grinder without any load for more than a few seconds.
Do not put your hands inside the drum while the grinder is working.
Do not allow children to operate the grinder.
Do not overload the motor with more than 2 litres of ingredients, adding them little by little.
ENG
Do not store food or any other items inside the drum while not in use.
Do not immerse the electrical cord, plug or any part of the grinder in water.
Do not lift/move the grinder when in operation.
Do not touch the running drum while in operation.
Do not use any other attachments with the grinder except the ones provided by the manufacturer.
Do not attempt to repair the grinder at home or allow any unauthorized person to repair it.
Please contact the nearest 100%Chef Distributor for assistance.
20 Cocina Sin Límites, S.L. www.100x100chef.comSolución de problemas
PROBLEMA CAUSA REMEDIO
La conchadora no funciona/no a. Fallo en la alimentación a. Compruebe la alimentación
arranca b. Conexión de cable mal colocada principal
en el enchufe b. Conecte los cables
c. Interruptor de sobrecarga correctamente
desconectado c. Desbloquee pulsando el
botón de sobrecarga
La conchadora arranca, pero a. Demasiada cantidad para ser a. Retire la cantidad sobrante
se detiene posteriormente molida en el tambor. y añada porción por porción
b. Insuficiente agua. después de iniciar la molienda.
ESP
c. Obstrucción física en el tambor. b. Añada más agua.
d. Pasta muy gruesa. c. Retire la obstrucción
comprobando el rodillo.
d. Agregue la cantidad
adecuada de agua y mezcle la
masa con la espátula
Si el soporte de las piedras a. El montaje no es correcto a. Colóquelo en posición
gira libremente b. El encaje está dañado por un correcta
mal uso. b. Sustituya la pieza dañada
Cocina Sin Límites, S.L. www.100x100chef.com 21Solución de problemas
PROBLEMA CAUSA REMEDIO
El tornillo superior no a. El montaje de la piedra y la a. Colóquelo en la posición
se cierra cerradura no están en la posición correcta.
correcta
Vibración de la a. La conchadora no está colocada a. Colóquelo sobre una
conchadora durante sobre una superficie nivelada. superficie nivelada
el uso b. Las patas de goma no están en b. Compruebe y corrija la
la posición correcta. posición de las patas de goma.
La conchadora se a. Fallo en la alimentación a. Compruebe el suministro
ESP
detiene durante la b. Baja tensión en la fuente de principal.
molienda alimentación b. Desconecte el molinillo y
c. Insuficiente agua en el espere hasta que la tensión se
tambor estabilice.
c. Añada la cantidad necesaria
de agua.
22 Cocina Sin Límites, S.L. www.100x100chef.comSolución de problemas
PROBLEMA CAUSA REMEDIO
La conchadora se a. Sobrecarga en el tambor. a. Saque la cantidad excedente.
calienta más de b. Baja tensión de alimentación. b. Desconecte la conchadora y
lo normal c. Formación de pasta gruesa en el espere hasta que la tensión se
tambor. estabilice.
d. La conchadora está cerca de una c. Agregue agua según sea
fuente de calor. necesario.
e. La ventilación de la conchadora está d. Cambie la posición de la
bloqueada. conchadora o de la fuente de
calor.
e. Retire la obstrucción.
ESP
La molienda a. Sobrecarga en el tambor. a. Coloque en la posición correcta.
tarda más b. Raspador en posición incorrecta. b. Corrija la posición.
tiempo de lo c. Bajo voltaje. c. Compruebe la tensión de
habitual d. El bloqueo superior no está entrada.
completamente apretado. d. Apriete el bloqueo superior.
En caso de duda, póngase en contacto con el distribuidor 100%Chef más cercano.
Cocina Sin Límites, S.L. www.100x100chef.com 23Troubleshooting
PROBLEM CAUSE REMEDY
Grinder does not run/start a.Power supply failure a.Check the main supply
b.Wire connection loose in the b.Connect wires properly
socket c.Insert correctly into the socket
c.Plug is not inserted properly d.Re-set using blunt edge pin
ENG
d.Overload switch tripped
Grinder starts but stops a. Too much quantity to be a. Remove the excess quantity
subsequently ground in the drum. and add portion by portion after
b. Insufficient water. starting the grinder.
c. Physical obstruction in the b. Add more water.
drum. c. Remove the obstruction by
d. Thick paste collection. checking and releasing it.
d. Add proper amount of water
and mix dough with the spatula
provided.
If the stones holder turn a. The assembly is not correct a. Place it in the correct position
freely b. The lace is damaged by b. Replace the damaged part
misuse.
24 Cocina Sin Límites, S.L. www.100x100chef.comTroubleshooting
PROBLEM CAUSE REMEDY
Top lock does not get a. Stone assembly and lock a. Check the main supply
locked are not in proper position. b. Connect wires properly
c. Insert correctly into the socket
d. Re-set using blunt edge pin
ENG
Vibration of the grinder a. Grinder is not placed on a. Place on a levelled surface
when in use a levelled surface. b. Check and correct the legs
b. Rubber legs not in position
position
Grinder stops during a. Power supply failure a. Check the main supply.
grinding b. Low voltage in power b. Switch off grinder and wait until
supply the voltage stabilizes.
c. Insufficient water in the c. Add the required quantity of
drum water.
Cocina Sin Límites, S.L. www.100x100chef.com 25Troubleshooting
PROBLEM CAUSE REMEDY
Grinding takes more time a. Overload in the drum. a. Place them in the right
b. Incorrect wiper guide. position.
c. Low voltage. b. Correct the position.
d. The top lock not tightened fully. c. Check the input voltage.
ENG
d. Tighten the top lock.
Grinder gets more heated a. Overload in the drum. a. Take out the excess quantity.
up than usually b. Low voltage for power supply. b. Switch off grinder and wait
c. Thick paste formation in the until the voltage stabilizes.
drum. c. Add water as required.
d. Grinder is near a heat source. d. Change the position of
e. Ventilation of the grinder is grinder/heat source.
blocked. e. Remove the blockage.
In case of any doubts contact the nearest 100%Chef Distributor.
26 Cocina Sin Límites, S.L. www.100x100chef.comCondiciones de garantía
Cocina Sin Límites, S.L., (en adelante, CSL) garantiza al comprador de la conchadora TWS-001 (en adelante,
“conchadora”) que está libre de defectos de material. Esta garantía es válida por un período de un año (1 año)
para uso profesional y dos años (2 años) para uso doméstico sobre el motor contra defectos de fabricación a
partir de la fecha de compra original, sujeta a los siguientes términos y condiciones:
1. La tarjeta de garantía debe ser completada y firmada por el comprador inmediatamente después de la
compra.
2. El mantenimiento de la conchadora debe ser realizado únicamente por el Servicio Técnico de CSL o por
su Centro de Servicio Autorizado.
ESP
3. El cliente deberá llevar la conchadora al Servicio Técnico de CSL / Centro de Servicio Autorizado más
cercano por su propia cuenta y riesgo.
4. La garantía continuará y permanecerá en vigor sólo durante el período restante de la garantía original, en
lo que respecta a la reparación/reemplazo de piezas de la conchadora.
5. CSL no será responsable de ningún accidente, pérdida o daño (directo o indirecto) a personas o bienes causados
por causa de:
a) Reparaciones/Servicio atendido por personal de servicio no autorizado.
b) Sobrecarga/mal uso/abuso y/o negligencia por parte de la persona.
c) Defectos causados por un uso inadecuado o imprudente.
d) Incumplimiento de cualquier precaución de seguridad o consejo de mantenimiento sugerido por CSL.
e) El número de serie original ha sido borrado o alterado o el sello a prueba de manipulaciones está dañado.
6. La garantía no cubre daños debidos a negligencia, mal manejo, rotura o agrietamiento de tapas, piedras, cuerpo
principal o abolladuras en el tambor de acero inoxidable.
7. Todas las reparaciones dentro de la garantía del producto de 1 año y de la garantía especial de 2 años del motor
(derivadas de defectos de fabricación) se realizarán sin cargo alguno. Trasporte y gastos de envío no quedan cubiertos
por esta garantía.
8. La garantía no será aplicable si el producto se utiliza para cualquier otro propósito que no sea el uso
descrito en este manual.
9. Cualquier queja/disputa será dentro de la jurisdicción del Tribunal de Barcelona.
Cocina Sin Límites, S.L. www.100x100chef.com 27Terms of Warranty
100%Chef (hereinafter referred to as the Company) warrants to the purchaser of “TSW -001 Wet Grinder”
(hereinafter referred to as Wet Grinder) that the said Wet Grinder is free from all defects in material and
workmanship. This warranty is valid for a period of one year (1 year) for professional use and two years (2 years)
for home use (against manufacturing defects from the date of original purchase, subject to the following
terms and conditions:
1. The warranty card is to be completed, signed by the dealer immediately on purchase. ( See page no. 29)
2. The Wet Grinder is only to be serviced by the Company Regional Service Centre or by its Authorized Service
Centre.
3. The customer shall carry the Wet Grinder to the nearest Company Regional Service Centre / Authorized
ENG
Service Centre at his/her own cost and risk.
4. The warranty will continue and remain in force only for the unexpired period of the original warranty, in
regard to the Repair/Replacement of parts of the Wet Grinder.
5. The Wet Grinder shall be used strictly for domestic purposes in accordance with the user’s manual.
6. The Company shall not be held liable for any accident, loss or damage (direct or indirect) to person or
property caused by reason of:
a) Repairs/Service attended by unauthorized service person.
b) Overloading/misuse/abuse or/and negligence on the part of the person.
c) Defects caused by improper/reckless use.
e) Failure to comply with any safety precaution or maintenance tip suggested by the Company.
f) Original serial number is deleted/defaced or altered or tamper proof seal is damaged.
7. The warranty does not cover damages due to negligence, mishandling, breakage or cracking of lids, stones,
main body or dents on stainless steel drum.
8. All repairs within the 1-year product warranty and 5-year special warranty on motor (arising out of
manufacturing defects) will be done free of charge. Our Service Centers will not charge you for those specific
components and labour.
9. The warranty will not be applicable if the product is used for any purpose other than domestic use.
10. Any complaint/disputes shall be within the jurisdiction of the Courts of Barcelona
28 Cocina Sin Límites, S.L. www.100x100chef.comATENCIÓN: MUY IMPORTANTE ATTENTION: VERY IMPORTANT
Lea detenidamente estas instrucciones Read these instructions carefully
TWIN STONES está pensada para refinar productos remojados TWIN STONES is specially designed to refine products
o bien que tengan un importante contenido acuoso o that are soaked or have a significant water or fat content.
graso. No obstante, es capaz de refinar e integrar pequeñas However, it is capable of refining and integrating small
cantidades de frutos secos (pistachos, avellanas, nueces, quantities of nuts (pistachios, hazelnuts, walnuts, almonds,
almendras, anacardos…), o semillas oleaginosas previamente cashew nuts...), or oil seeds previously ground or of a very
molidas o de muy pequeño tamaño como el sésamo, small size such as sesame, legumes like peanuts, spice
legumbres como el cacahuete, especias en polvo…, en powders..., in additives such as sugars, honeys, oils or lard.
añadidos como azúcares, mieles, aceites o mantecas. Todos All these dry products must be incorporated, previously
estos productos secos deben irse incorporando, previamente ground, little by little. The maximun quantity must be 1 kg.
molidos, poco a poco y como máximo debe ser 1 kg.
Otros productos en polvo siempre deberán trabajarse con Other powdered products should always be worked with
algún producto cremoso como por ejemplo chocolate u some creamy product such as chocolate or others.
otros.
Debemos notificarles que trabajar productos secos o duros, Please, be aware that working with dry or hard products,
sin liquido u otros componentes fluidos, pueden desgastar without liquid or other fluid components, can wear out the
las piedras o los encajes del tambor. stones or the laces on the drum.
Twin Stones no es un molinillo o una refinadora Twin stones is not a grinder or a refiner with
con cuchillas. blades.
La garantía no cubre el desgaste o deterioro de sus piezas o The warranty does not cover wear or deterioration of its parts
componentes. or components.
Cocina Sin Límites, S.L. www.100x100chef.com 29Warranty Card (customer’s copy)
This page has to be treated as a full fedged warranty card and is required to be maintained by
you. You will be required to produce this while claiming the service within the warranty period. In
the unlikely event that a defect should develop in the 100%Chef Wet Grinder during the period
of this warranty, the product should be delivered at your cost to the Authorized Service Centre or
Authorized Distributor along with this warranty card.
Machine description Customer’s Details
Model: TWG-001 Customer’s name
Power: 200W AC. 230V 50-60Hz Company name
AC. 110V 60Hz
Adress
Country
Serial No.:
Purchase date
Name of store or web
Country
Company Name:
Address:
Dealer’s Stamp & AddressCERTIFICATE OF COMPLIANCE
Cocina sin Límites SL certifies that WET GRINDER TWS-001 complies with:
- European Regulation 1935/2004 of October 27th, 2004, related to material and articles intended to
come into contact with food.
- European Regulation No 2023/2006 — Good manufacturing practice for materials and articles
intended to come into contact with food.
Complies with the requirement of the “LVD”
The quality system for these products has been assessed according to the procedure of conformity
assessment Prescribed.
This certificate is issued in pursuant to the assessment done, under the provision
- Low Voltage Directive 2014/35/EU
QCC has liabilities limited to the audit for the certification of the products and in case of alteration of the
product, not agreed upon by us, these declarations will lose its validity
Certificate No.: CE/08521/1118
Original Certificate Date: 30-November-2018
Expiry date: 29-November-2021
A.Salvador
Director and Quality Manager
100%Chef marca reg. por Cocina sin límites, S.L. Cif ES-B64888860
Sociedad inscrita en el RG. Mercantil en Tomo 40826 Folio 122 Hoja B 376389©
SPEED LIMITER
BROWN
ENG
230V/110V ENGINE
BLUE
ON/OFF Switch
ESP
LED 230V/110V
RED CONNEXION
Item no.: TWS-001
Reference no.: 30/0054 - 30/0053
Cocina Sin Límites, S.L.Cocina Sin Límites S.L.
Porto 44, 08032 Barcelona (Spain)
orders@100x100chef.com
+34 93 429 63 40
www.100x100chef.com
v3. May 2021También puede leer